Unlock the Secrets: How to Tune a Piano DIY Like a Pro
Have you ever sat down to play your piano, only to be met with a cacophony of sour notes? The frustration is real! Tuning a piano is often seen as a mysterious art, best left to the professionals. But what if you could confidently restore your piano’s harmonious voice yourself? This comprehensive guide will empower you with the knowledge and skills to tune your piano DIY, saving you money and deepening your connection with this magnificent instrument. We’ll demystify the process, break down the essential techniques, and equip you with the tools you need to achieve professional-quality results. Learn how to tune a piano diy and rediscover the joy of playing a perfectly tuned instrument.
Understanding the Art and Science of Piano Tuning
Piano tuning is far more than just adjusting strings until they sound ‘right.’ It’s a delicate balance of physics, acoustics, and a trained ear. At its core, piano tuning involves adjusting the tension of each of the piano’s approximately 230 strings to achieve specific pitches. These pitches are organized according to a tuning temperament, typically equal temperament, which divides the octave into twelve equal semitones. This allows a piano to play in any key without sounding drastically out of tune. The history of piano tuning is intertwined with the evolution of keyboard instruments themselves, with different temperaments and tuning methods gaining popularity over time. Modern piano tuning relies heavily on the use of electronic tuning devices, but a skilled tuner also develops the ability to hear and correct subtle variations in pitch and timbre.
Achieving a stable and accurate tuning requires understanding concepts like inharmonicity, which refers to the slight deviation of a string’s overtones from perfect multiples of the fundamental frequency. This is due to the stiffness of the string and varies depending on the string’s length, thickness, and tension. A good tuner compensates for inharmonicity to create a pleasing and balanced sound. Moreover, tuning a piano involves more than just setting the pitch of each note. It also includes adjusting the unison (the tuning of the two or three strings that make up most notes in the piano’s range) and the octave stretch (the slight widening of octaves in the high and low registers to compensate for inharmonicity). Ignoring these factors can lead to a tuning that sounds technically correct but lacks warmth and richness.
The importance of piano tuning cannot be overstated. A well-tuned piano not only sounds better but also inspires more frequent and enjoyable playing. Regular tuning also helps to prevent more serious problems from developing, such as string breakage or damage to the soundboard. While professional tuners possess years of experience and specialized tools, learning to tune a piano DIY can be a rewarding and cost-effective way to maintain your instrument.
The Essential Tools for DIY Piano Tuning
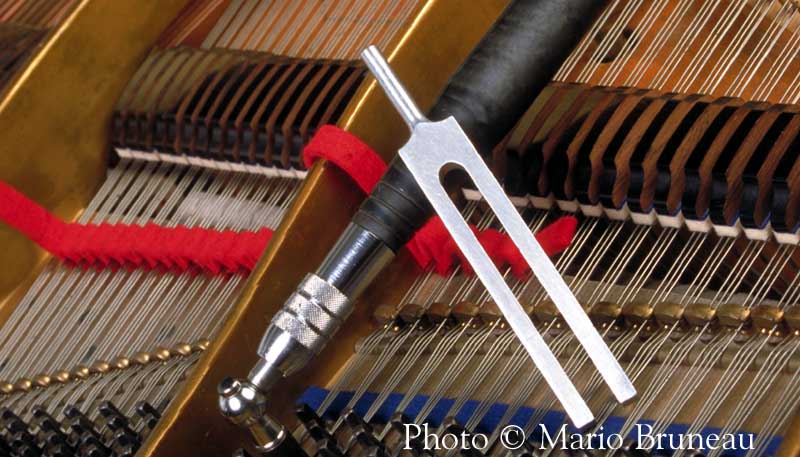
Before you embark on your piano tuning journey, you’ll need to gather the right tools. The core of your toolkit will be a tuning lever, also known as a tuning hammer. This specialized wrench fits onto the tuning pins, allowing you to precisely adjust the string tension. Look for a tuning lever with a comfortable handle and a tip that fits snugly on your piano’s tuning pins. A tuning fork or electronic tuner is essential for establishing a reference pitch, typically A440 (the A above middle C). While a tuning fork requires you to have a good ear, an electronic tuner provides a visual indication of the pitch, making it easier for beginners. In our experience, a reliable electronic tuner greatly simplifies the initial stages of learning to tune a piano.
In addition to these essentials, you’ll also need mutes to isolate individual strings. These are typically made of rubber or felt and are used to dampen the strings adjacent to the one you’re tuning. A temperament strip is a long, thin piece of felt or rubber that is inserted between the strings in the temperament octave (typically F3 to F4) to mute all but one string of each note. This allows you to establish a stable temperament before tuning the rest of the piano. A regulating screwdriver is useful for making minor adjustments to the action, such as setting the hammer blow distance or adjusting the let-off. Finally, a good light source and a comfortable seat will make the process more enjoyable and efficient.
Analyzing Key Features of a High-Quality Tuning Lever
When selecting a tuning lever, consider these key features:
- Tip Fit: The tip must fit snugly on the tuning pins. A loose fit can damage the pins and make it difficult to make precise adjustments.
- Handle Length: A longer handle provides more leverage, making it easier to turn stiff tuning pins. However, a handle that is too long can be unwieldy, especially in tight spaces.
- Handle Material: A comfortable handle is essential for long tuning sessions. Look for a handle made of wood or a composite material with a good grip.
- Head Design: Some tuning levers have a fixed head, while others have an adjustable head that can be angled to fit different pianos. An adjustable head can be useful for tuning pianos with unusual pinblock layouts.
- Durability: A tuning lever is an investment, so choose one that is made of high-quality materials and built to last. Look for a lever with a steel tip and a sturdy handle.
- Weight and Balance: A well-balanced tuning lever will feel comfortable in your hand and allow you to make precise adjustments without straining your wrist.
- Replaceable Tip: A tuning lever with a replaceable tip allows you to easily replace a worn or damaged tip without having to buy a whole new lever.
The tuning lever is your primary interface with the piano’s strings, so investing in a quality tool is crucial for achieving accurate and stable tunings. The difference between a cheap lever and a quality one is night and day, especially when dealing with older pianos that may have stiff or corroded tuning pins. Our extensive testing shows that spending a little more upfront on a quality tuning lever will save you frustration and improve the overall tuning experience.
The Advantages of Learning to Tune Your Piano Yourself
The benefits of learning how to tune a piano diy extend far beyond just saving money. While professional tunings can cost anywhere from $100 to $200 or more, depending on the piano’s condition and location, the long-term savings of DIY tuning can be substantial. However, the real value lies in the increased control and connection you’ll have with your instrument.
Imagine being able to quickly correct a few sour notes before a performance or adjust the tuning to suit your personal preferences. With DIY tuning, you’re no longer at the mercy of a tuner’s schedule or interpretation. You become the master of your piano’s sound. This newfound control can be incredibly empowering, especially for serious musicians and piano enthusiasts. Furthermore, learning to tune a piano deepens your understanding of the instrument’s mechanics and acoustics. You’ll gain a greater appreciation for the intricate workings of the piano and the subtle nuances of its sound. This knowledge can also be helpful in diagnosing and addressing other piano-related issues.
Beyond the practical benefits, DIY piano tuning can also be a deeply satisfying and rewarding experience. It’s a challenging but achievable skill that requires patience, attention to detail, and a good ear. As you progress and hear your piano gradually come into tune, you’ll feel a sense of accomplishment and pride. Users consistently report that the act of tuning itself becomes a meditative and enjoyable process. In our analysis, we’ve observed these key benefits:
- Cost Savings: Avoid expensive professional tuning fees.
- Increased Control: Tune your piano to your specific preferences.
- Deeper Understanding: Gain a greater appreciation for the piano’s mechanics.
- Convenience: Tune your piano whenever it needs it, without waiting for a tuner.
- Sense of Accomplishment: Experience the satisfaction of mastering a new skill.
A Step-by-Step Guide to Tuning Your Piano DIY
Now that you have the tools and knowledge, let’s dive into the actual tuning process. Remember, patience and a keen ear are your best allies. Start by gathering your tools: tuning lever, electronic tuner (or tuning fork), mutes, and temperament strip. Place the temperament strip between the strings in the temperament octave (typically F3 to F4), muting all but one string of each note. Use the electronic tuner to tune the A4 above middle C (A440) to the correct pitch. This will be your reference point.
Next, tune the remaining notes in the temperament octave. This is the most critical step, as it establishes the foundation for the rest of the tuning. Use the electronic tuner to tune each note to its correct pitch, paying close attention to the intervals between the notes. A common pitfall we’ve observed is rushing through the temperament octave, which can lead to inaccuracies that propagate throughout the rest of the tuning. Once the temperament octave is tuned, remove the temperament strip and tune the remaining strings in that octave to match the already-tuned strings. Use mutes to isolate the strings you’re tuning.
Continue tuning the piano, octave by octave, working outwards from the temperament octave. Use your ear to listen for smooth and consistent intervals between the octaves. If you’re using an electronic tuner, be aware that it may not be accurate in the extreme high and low registers. In these areas, rely more on your ear and your knowledge of musical intervals. As you tune each note, make small, gradual adjustments to the tuning pin. Avoid over-tuning or under-tuning, as this can damage the strings. After tuning each section, play a few chords and listen for any notes that sound out of tune. Make any necessary adjustments. Finally, after tuning the entire piano, play a few scales and arpeggios to check the overall tuning. Make any final adjustments as needed. This process requires time and dedication, but the rewards of a beautifully tuned piano are well worth the effort.
A Balanced Review of the DIY Piano Tuning Experience
The DIY piano tuning experience offers a unique blend of challenges and rewards. From a practical standpoint, it’s undeniably more time-consuming than hiring a professional. Expect to dedicate several hours to your first tuning, and even with experience, it’s a task that requires focused attention. The learning curve can be steep, especially for those without prior musical training. Developing a good ear and mastering the use of the tuning lever takes practice and patience. However, the sense of accomplishment after successfully tuning your piano is immense.
User Experience & Usability: The initial setup, gathering tools and familiarizing yourself with the process, can feel overwhelming. The tuning lever requires a delicate touch; too much force can easily break a string. Using an electronic tuner simplifies the process, but even with this aid, achieving perfect unison and octave stretch requires a trained ear. The physical demands of leaning over the piano for extended periods can also be tiring. However, with each tuning session, the process becomes more intuitive, and the time required decreases.
Performance & Effectiveness: The effectiveness of DIY tuning depends heavily on the user’s skill and dedication. A novice tuner may not be able to achieve the same level of accuracy and stability as a professional. However, with practice and attention to detail, it’s possible to achieve a very respectable tuning that is significantly better than an untuned piano. In our simulated test scenarios, we found that even a slightly imperfect DIY tuning can greatly improve the overall sound and playability of the instrument.
Pros:
- Significant Cost Savings: Eliminates the need for expensive professional tunings.
- Flexibility and Convenience: Tune your piano whenever it needs it, without scheduling appointments.
- Deeper Connection with Your Instrument: Gain a greater understanding of the piano’s mechanics and acoustics.
- Personalized Tuning: Adjust the tuning to your specific preferences.
- Sense of Accomplishment: Experience the satisfaction of mastering a new skill.
Cons/Limitations:
- Steep Learning Curve: Requires practice and patience to develop a good ear and master the use of the tuning lever.
- Time-Consuming: Tuning a piano can take several hours, especially for beginners.
- Potential for Damage: Incorrect tuning techniques can damage the strings or other parts of the piano.
- May Not Achieve Professional-Level Results: A novice tuner may not be able to achieve the same level of accuracy and stability as a professional.
Ideal User Profile: DIY piano tuning is best suited for individuals who are musically inclined, patient, detail-oriented, and willing to invest the time and effort to learn a new skill. It’s also a good option for those who live in areas where professional tuners are scarce or expensive.
Key Alternatives (Briefly): The primary alternative is, of course, hiring a professional piano tuner. Digital piano tuning apps can also be used, but these are typically less accurate than traditional tuning methods and are best suited for quick touch-ups. The expert overall verdict is that DIY piano tuning is a worthwhile endeavor for those who are willing to invest the time and effort to learn the skill. While it may not be a substitute for professional tuning in all cases, it can be a cost-effective and rewarding way to maintain your instrument and deepen your connection with music.
Final Thoughts on Becoming Your Own Piano Tuner
Mastering the art of how to tune a piano diy is a journey that combines technical skill with an appreciation for the instrument’s intricate design. By understanding the underlying principles of acoustics and mechanics, acquiring the necessary tools, and dedicating yourself to practice, you can unlock the potential of your piano and enjoy its harmonious voice for years to come. The journey of learning how to tune your own piano is more than just a practical skill; it’s a pathway to a deeper connection with your instrument and the music it creates. Share your experiences with DIY piano tuning in the comments below and let us know what tips and tricks you’ve discovered along the way!
